9.7.5 Build and Run Our Client Project to Query Faculty Data via Web Service
Click on the Clean and Build Main Project button to build our client project. If every-thing is fine, click on the Run Project button on the top (green arrow) to run our client project.
On the opened Web page, which is shown in Figure 9.41, enter a desired faculty name such as Ying Bai into the Faculty Name field. Then click the Select button to perform a query for this selected faculty member. The query result is returned and displayed in this page, as shown in Figure 9.41. Click on the Back button to terminate this project if you like.
Our Web client project used to consume our Web service WebServiceFaculty is success-ful! A complete Web client project, WebClientFaculty _ Select, can be found in the project folder Class DB Projects\Chapter 9 in the Students folder on the CRC Press ftp site (refer to Figure 1.2 in Chapter 1).
Next, let’s discuss how to build a Web service to perform data insertion into our sample Oracle database.
9.8 BUILD JAVA WEB SERVICES TO INSERT DATA INTO THE ORACLE DATABASE
To perform a faculty record insertion to our sample database using our Web service, we need to add another operation called InsertFaculty() into our Web service project, WebServiceFaculty.
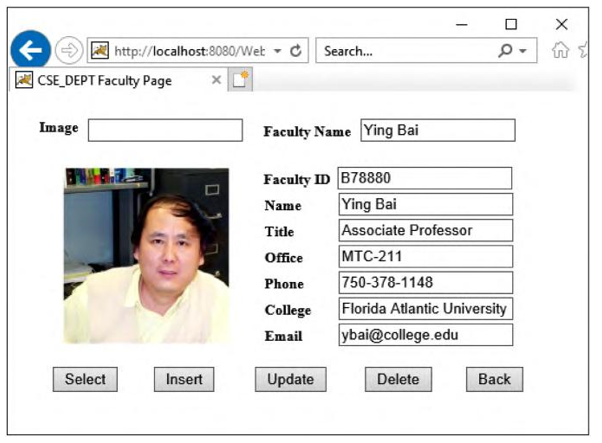
FIGURE 9.41 The test result for our Web client project.
9.8.1 Add a New Operation InsertFaculty() into Our Web Service Project
Perform the following operations to add this operation into our Web service:
1) Launch NetBeans IDE 12.0 and open our Web application project, WebAppFaculty, and open our Web service main class file, WebServiceFaculty.javainthe Projects window.
2) Click on the Design button at the top of the window to open the Design View of our Web service class file WebServiceFaculty.java.
3) Click on the Add Operation button to open the Add Operation wizard.
4) Enter InsertFaculty into the Name field and click on the Browse button that is next to the Return Type combo box. Type boolean into the Type Name field, select the item Boolean (java.lang) from the list and click on the OK button.
5) Click on the Add button and enter fdata into the Name parameter field. Then click on the dropdown arrow of the Type combo box and select the Choose item to open the Find Type wizard. Type Arraylist into the top field and select the ArrayList (java.util) data type, and click on the OK button to select an ArrayList as the data type for the input parameter.
Your finished Add Operation wizard should match the one shown in Figure 9.42. Click on the OK button to complete the new operation creation process.
Click on the Source button on the top of this window to open the code window of our Web service class file. Let’s build the code for this new added operation.
In the opened code window, enter the code shown in Figure 9.43 into this new added operation, InsertFaculty().
Let’s have a closer look at this piece of code to see how it works.
A. First a local integer variable, numInsert, is created, and it is used to hold the run result of inserting a new faculty record into our sample database.
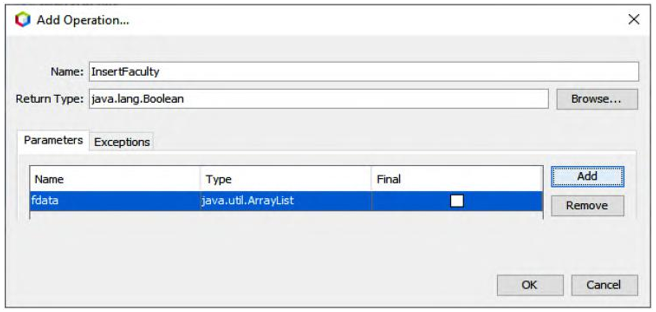
FIGURE 9.42 The complete Add Operation wizard.