9.5 BUILD JAVA WEB SERVICE PROJECTS TO ACCESS AND MANIPULATE THE FACULTY TABLE
In this section, we will discuss how to query and manipulate the Faculty Table against our Oracle database using Java Web services. To make our Web Services project simple, we will use the fol-lowing components to fulfill the query and manipulation actions:
- Build different operations or methods in our Web services as interfaces to communicate with Web clients that will be built in the future to perform desired data actions.
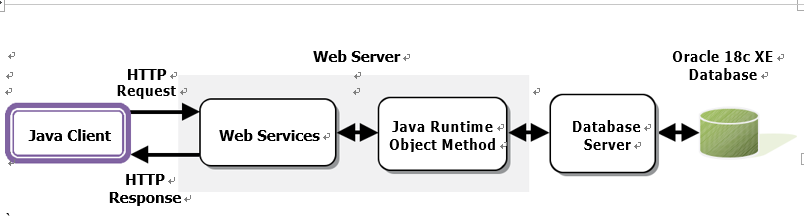
FIGURE 9.20 The structure and components used in our Web services.
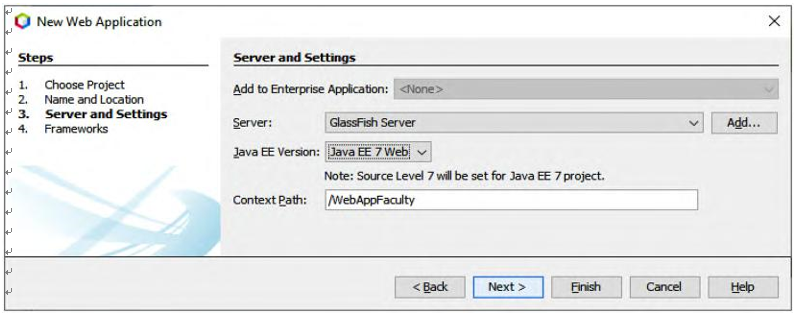
FIGURE 9.21 The finished Server and Settings wizard.
- Use the runtime object method to actually access and query our sample Oracle database.
- The structure and components used in our Web services are shown in Figure 9.20.
- Now let’s create our first Web service project to perform data query and manipulation against our sample database.
9.5.1 Create a New Java Web Application Project, WebAppFaculty
When creating a new Web service application project, we need to select a desired container to deploy our Web service. Generally we can either deploy our Web service in a Web container or an EJB container. In this application, we prefer to use a Web container, since we are creating a Java EE 7 application.
Perform the following operations to create our Web application project, WebAppFaculty:
1) Launch NetBeans IDE 12.0 and choose File > New Project (Ctrl-Shift-N). Expand the Java with Ant folder, select Java Web under the Categories list and Web Application from the Projects list. Click on the Next button to continue.
2) Name the project WebAppFaculty and click on the Browse button to select a desired location for the project. In this application, we used C:\Class DB Projects\ Chapter 9 as our project location. Click on the Next button to continue.
3) Select GlassFish Server as our Web container and Java EE 7 Web as the Java EE version. Your finished Server and Settings wizard should match the one shown in Figure 9.21. Click on the Finish button to complete the new application creation process.
Now that a Web application has been created with a selected Web container, next we can create our new Web service project, WebServiceFaculty.