9.9.3 Build and Run Our Client Project to Insert Faculty Data via Web Service
One more step we need to do prior to building and running our project is to reserve all faculty image files since we need to insert a new faculty member with a new image file. All faculty image files can be found in the folder Images\Faculty in the Students folder on the CRC Press ftp site (refer to Figure 1.2 in Chapter 1). you can copy those files from that folder and save them to a folder on your local machine, such as C:\Images\Faculty.
Now click on the Clean and Build Main Project button to build our client project. If everything is fine, click on the Run Main Project button to run our client project.
The FacultyFrame form window is displayed. First let’s perform a faculty query action. Select
a desired faculty member, such as Ying Bai, from the Faculty Name combo box, and click on the Select button to query the detailed information for this faculty member via our Web service WebServiceFaculty. The queried result is displayed in seven text fields.
Now enter a new faculty record with the seven pieces of new faculty information shown into seven text fields, which is shown in Figure 9.46.
| • | Faculty ID: | B86577 |
| • | Faculty Name: | Susan Bai |
| • | Title: | Professor |
| • | Office: | MTC-314 |
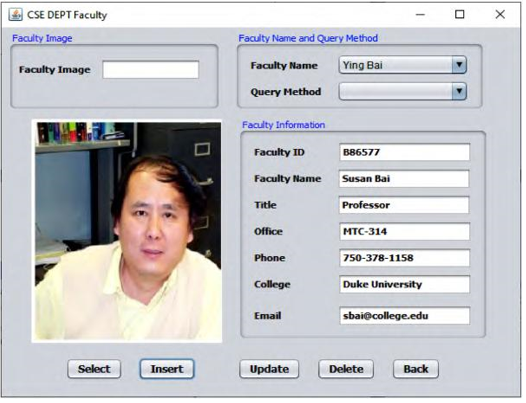
FIGURE 9.46 The seven pieces of new inserted faculty information.
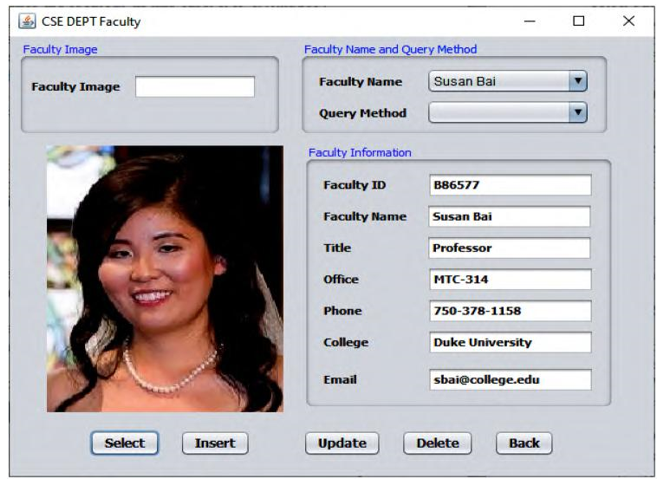
FIGURE 9.47 The retrieved new inserted faculty record.
| • | Phone: | 750–378–1158 |
| • | College: | DukeUniversity |
| • | Email: | [email protected] |
Click on the Insert button to open the File Chooser wizard. In the opened File Chooser wizard, browse to the location where all faculty image files are located, in this case C:\Images\ Faculty; select the desired image, White.jpg; and click on the Open button to select this faculty image and insert it into the Faculty Table in our sample database.
To confirm this data insertion, two methods can be used. First we can use the Select button in this form to perform a query to try to retrieve the inserted faculty record. To do this, go to the Faculty Name combo box, and you can see that the new faculty name, Susan Bai, has been added into this box. Click to select it and click on the Select button. The new inserted faculty record is retrieved and displayed in this form, as shown in Figure 9.47. Click on the Back button to terminate our client project.
The second way to confirm this data insertion is to open our Faculty Table using either the Services window in the NetBeans IDE or the Oracle SQL Developer to check whether the new faculty record has been inserted. To do that using the Services window in the NetBeans IDE, performing the following operations:
1) Open the Services window and expand the Databases node.
2) Right-click on our sample Oracle database URL: jdbc:oracle:thin:@local host:1521:XE;, and select the Connect item to connect to our database. You may need to enter a valid password, oracle _ 18c, to complete the database connection action.
3) Expand our sample database, CSE _ DEPT, and Tables.
4) Right-click on the Faculty Table and select the View Data item.

FIGURE 9.48 The opened Faculty Table in the NetBeans IDE.
Your opened Faculty Table is shown in Figure 9.48. It can be seen that the new faculty record, Susan Bai, with the faculty _ id of B86577, which is located in the fourth row, indicated by the dark color in this Table, has been successfully inserted into our database.
Next let’s build a Web-based client project to consume our Web service to insert a new faculty record into the Faculty Table in our sample database.