9.11 BUILD JAVA WEB SERVICE TO UPDATE AND DELETE DATA FROM THE ORACLE DATABASE
It is straightforward to perform data update and delete actions against our sample Oracle data-base via Web service, and we can add two more new operations, UpdateFaculty() and DeleteFaculty(), into our Web service project WebServiceFaculty we built in the previous sections. First let’s concentrate on the faculty data update action.
One key point to be noted when performing a data update action is that in most real applications, a completed faculty record should be updated, except the faculty _ id, since it is much easier to insert a new faculty record with a new faculty _ id than to update a record with an updated faculty _ id because of the complexity in cascaded update relationships we built in Chapter 2 when we created our sample database. Therefore, in this section, we will concentrate on the updat-ing a faculty record based on an existing faculty _ id.
9.11.1 Add a New Operation UpdateFaculty() to Perform Faculty Data Update
Perform the following operations to add a new operation, UpdateFaculty(), into our Web ser-vice project, WebServiceFaculty:
1) Launch NetBeans IDE 12.0 and open our Web application project, WebAppFaculty, and our Web service main class file, WebServiceFaculty.java, in the Projects window.
2) Click on the Design button at the top of the window to open the Design View of our Web service class file, WebServiceFaculty.java.
3) Click on the Add Operation button to open the Add Operation wizard.
4) Enter UpdateFaculty into the Name field and click on the Browse button next to the Return Type combo box. Type boolean into the Type Name field and select the item Boolean (java.lang) from the list, and click on the OK button.
5) Click on the Add button and enter fdata into the Name parameter field. Then click on the dropdown arrow of the Type combo box, and select the Choose item to open the Find Type wizard. Type Arraylist into the top field and select the ArrayList (java. util) data type, and click on the OK button to select an ArrayList as the data type for the input parameter.
Your finished Add Operation wizard should match the one shown in Figure 9.55. Click on the OK button to complete the new operation creation process.
Click on the Source button on the top of this window to open the code window of our Web service project. Let’s develop the code for this new added operation.
In the opened code window, enter the code shown in Figure 9.56 into the new operation.
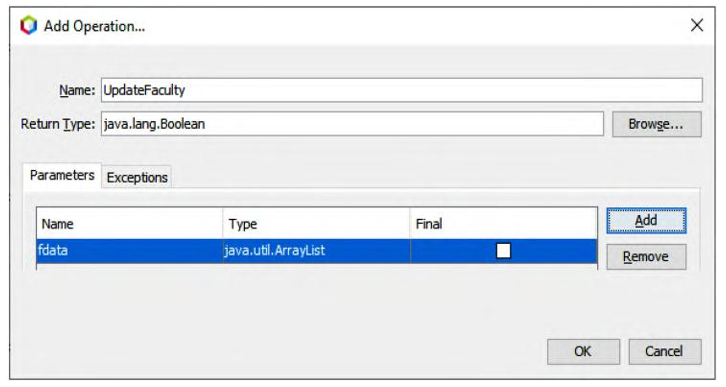
FIGURE 9.55 The complete Add Operation wizard.
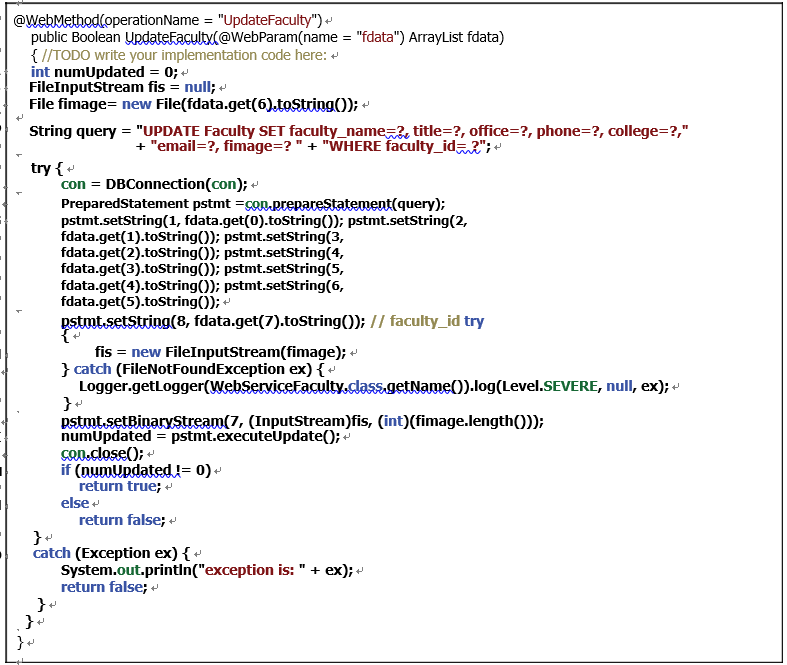
FIGURE 9.56 The code for the new operation, UpdateFaculty().